Visual Studio 2017에서는 기본적으로 Google Test Adapter를 제공하지만, 이를 수동으로 추가해야 하는 경우라면 다음과 같이 수행 한다.
1. Google Test Build
Google Test Github 페이지에서 최신 버전의 google test 소스 코드를 다운 받는다.
다운 받은 파일의 압축을 풀고
googletest/msvc/2010/
폴더에서 Visual studio 솔루션 파일인 gtest.sln 을 실행시킨다.
폴더의 경로는 버전에 따라 다를 수 있다.
Visual studio에서 googletest를 빌드 한다.
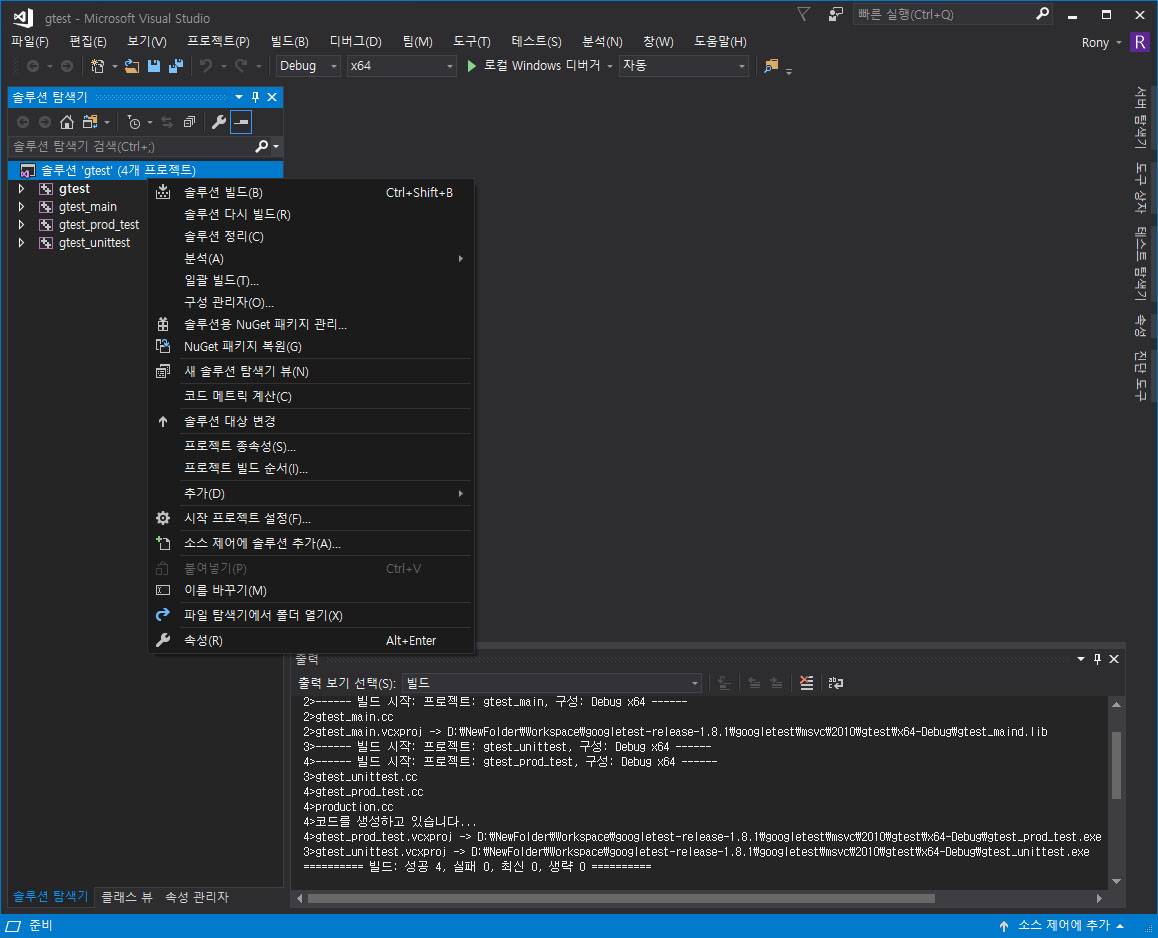
여기서 기본 솔루션 플랫폼은 Win32로 되어 있지만, x64플랫폼으로 변경하여 빌드하였다.
2. Project에 googletest library 추가
googletest를 기존의 프로젝트에서 사용하기 위해 googletest/include 폴더의 header file들과 googletest/msvc/2010/gtest/x64-Debug 폴더의 library 파일들을 현재 프로젝트 밑의 googletest 폴더에 복사한다.
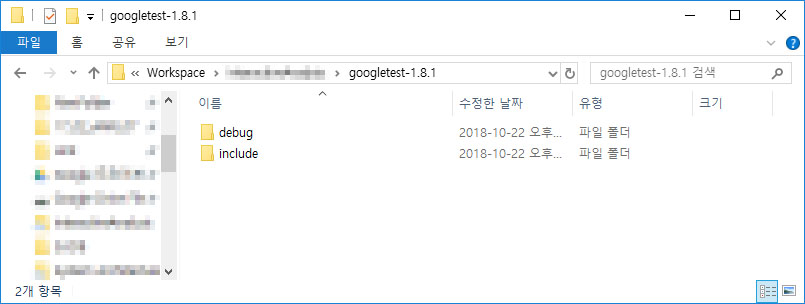
이후 프로젝트에서 googletest library를 추가한다.
a. C/C++ option 변경
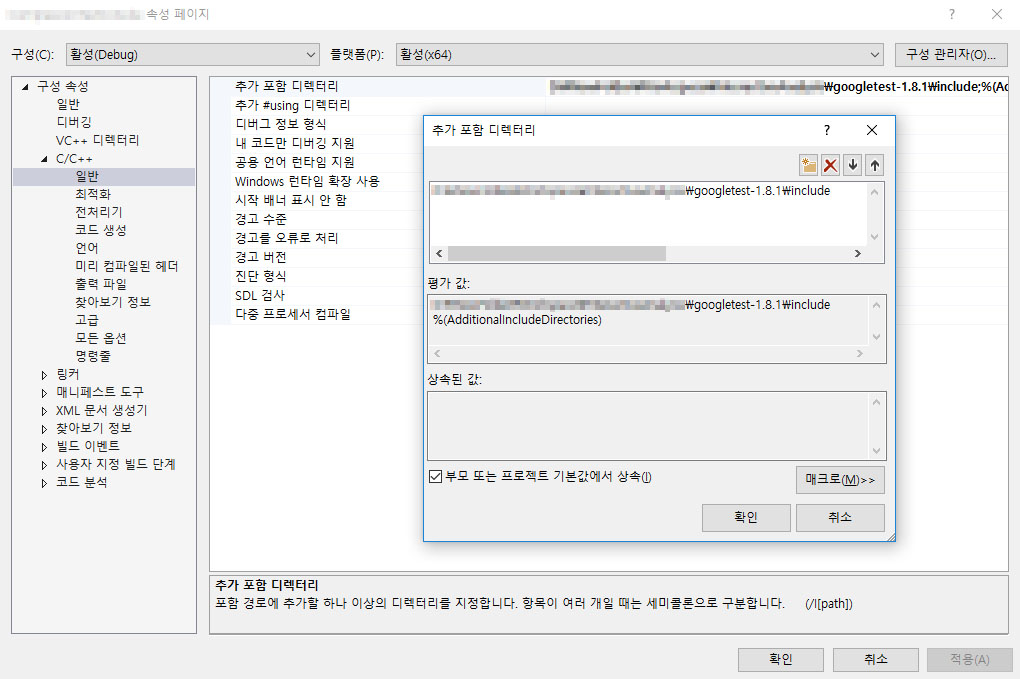
C/C++ > 일반 > 추가 포함 디텍터리에 include 폴더를 추가하고,
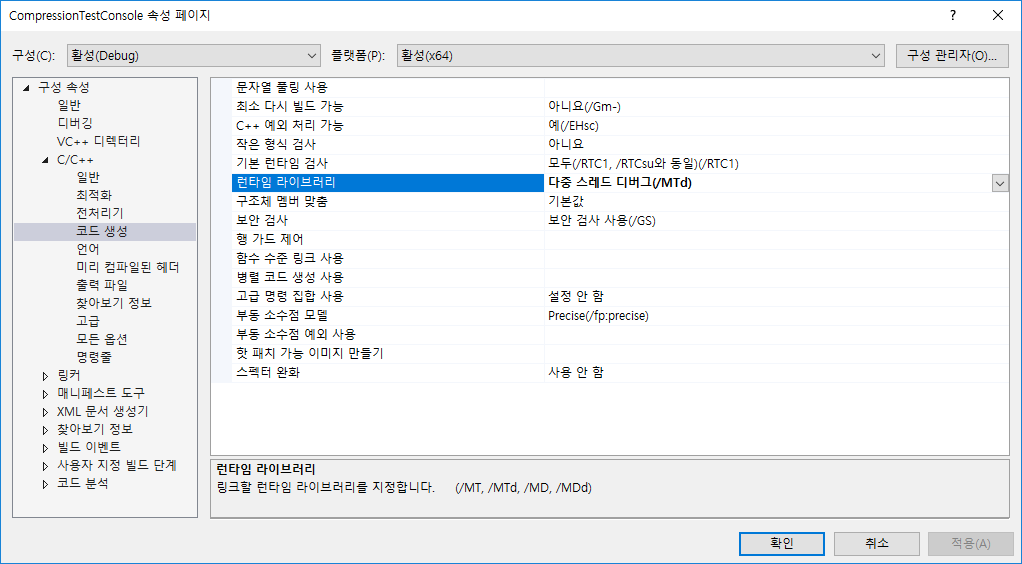
런타임 라이브러리를 다중 스레드 디버그 (/MTd) 로 교체한다.
b. 링커 option 변경
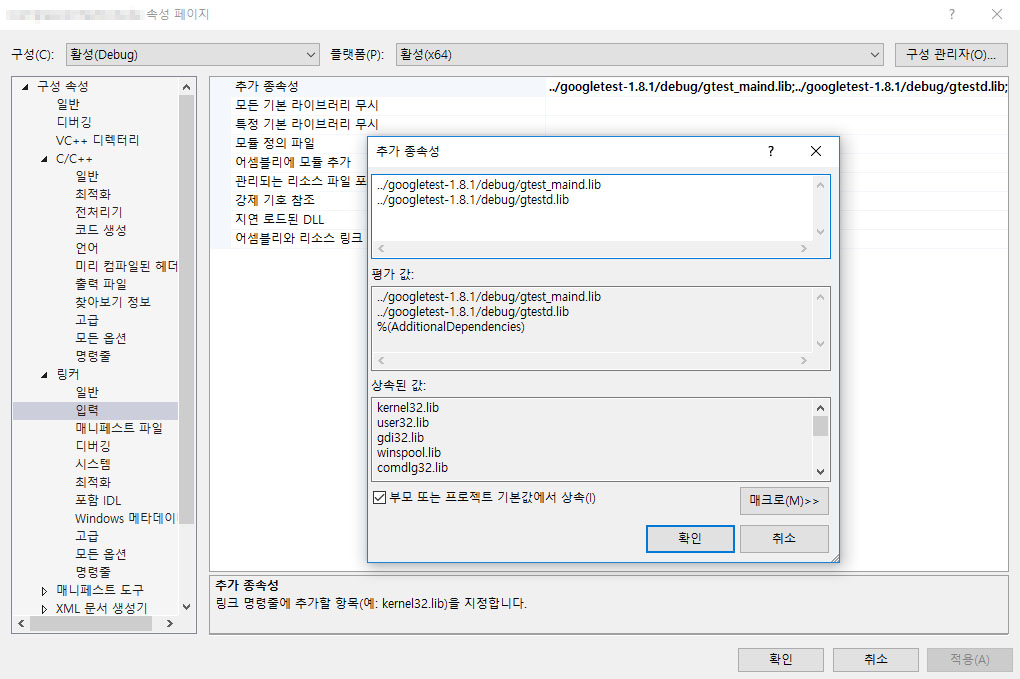
링커 > 입력 > 추가 종속성에 lib 파일들을 추가한다.
3. Test 작성
pre-compiled header에 gtest 헤더를 추가한다.
#include <gtest/gtest.h>
Test를 위한 class를 및 Test 코드를 작성한다.
class MyTest : public ::testing::Test
{
    void SetUp() override {
        // Code here will be called immediately after the constructor (right
        // before each test).
    }

    void TearDown() override {
        // Code here will be called immediately after each test (right
        // before the destructor).
    }
};

TEST(MyTest, defaultTest)
{
    EXPECT_TRUE(true);
}
Test 수행을 위한 main 문을 작성한다.
int main(int argc, char **argv)
{
    ::testing::InitGoogleTest(&argc, argv);

    return RUN_ALL_TESTS();
}
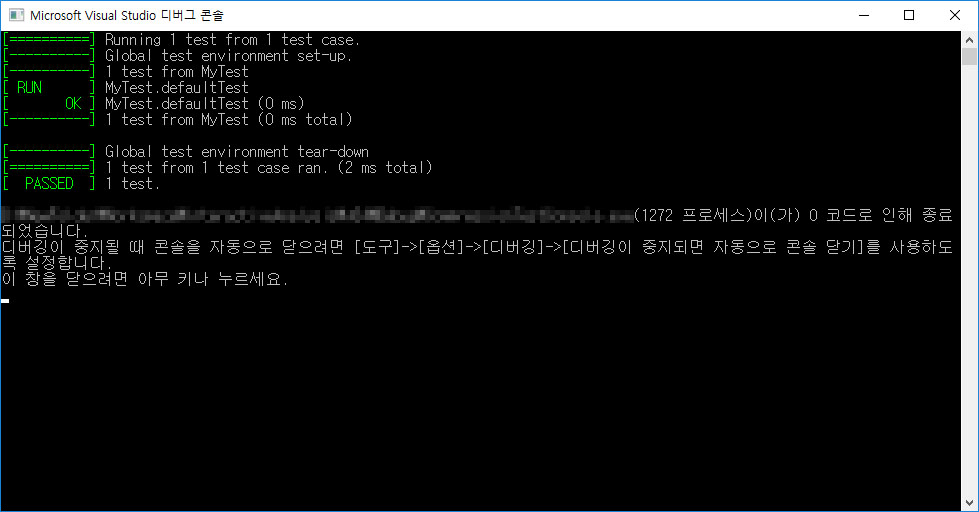
프로젝트를 수행하면 다음과 같다.

![[C++] Vcpkg 이용하여 boost 라이브러리 설치하기](https://tech.sangron.com/wp-content/uploads/sites/2/2018/10/cpp_wallpaper-768x480.jpg)
![[Ubuntu] 14.04에서 gcc/g++ 4.9 설치하기](https://tech.sangron.com/wp-content/uploads/sites/2/2017/12/ubuntu_wallpaper_2-768x480.jpg)

![[Docker] 시작하기](https://tech.sangron.com/wp-content/uploads/sites/2/2025/08/Docker_wallpaper_1920x1080-150x150.jpg)
![[Spark] Spark 설치 (ubuntu)](https://tech.sangron.com/wp-content/uploads/sites/2/2025/01/Spark_wallpaper_1920x1080-150x150.jpg)