
Visual Studio 2012 설정
1. CUDA 5.0.props 파일
CUDA5.0.props 파일을 열어 아래 부분을 찾습니다.
<CudaClVersion Condition="'$(PlatformToolset)' == 'v90'">2008</CudaClVersion>
<CudaClVersion Condition="'$(PlatformToolset)' == 'v100'">2010</CudaClVersion>
다음 라인에 아래와 같이 추가로 적습니다.
<CudaClVersion Condition="'$(PlatformToolset)' == 'v110'">2010</CudaClVersion>
2. CUDA 5.0.targets 파일
CUDA5.0.targets 파일을 열어 CudaCleanDependsOn 부분을 찾아 아래와 같이 교체합니다.
<CudaCleanDependsOn>
  $(CudaCompileDependsOn);
  _SelectedFiles;
  CudaFilterSelectedFiles;
  AddCudaCompileMetadata;
  AddCudaLinkMetadata;
  AddCudaCompileDeps;
  AddCudaCompilePropsDeps;
  ValidateCudaBuild;
  ValidateCudaCodeGeneration;
  ComputeCudaCompileOutput;
  PrepareForCudaBuild
</CudaCleanDependsOn>
GenerateRelocatableDeviceCode 부분을 찾아 아래와 같이 교체합니다.
GenerateRelocatableDeviceCode="%(CudaCompile.GenerateRelocatableDeviceCode)"
CodeGeneration 부분을 찾아 아래와 같이 교체합니다.
CodeGeneration="%(CudaCompile.CodeGenerationValues)"
CommandLineTemplate 부분을 찾아 아래와 같이 교체합니다.
CommandLineTemplate=""$(CudaToolkitNvccPath)" %(CudaCompile.BuildCommandLineTemplate) %(CudaCompile.ApiCommandLineTemplate) %(CudaCompile.CleanCommandLineTemplate)" />
수정한 상단 두 파일을 “C:\Program Files (x86)\MSBuild\Microsoft.Cpp\v4.0\V110\BuildCustomizations\” 폴더로 복사합니다.
3. host_config.h 파일
32비트 사용시
“C:\Program Files (x86)\NVIDIA GPU Computing Toolkit\CUDA\v5.0\include”
64비트 사용시
“C:\Program Files\NVIDIA GPU Computing Toolkit\CUDA\v5.0\include\”
폴더에서 host_config.h 파일을 수정합니다.
#if _MSC_VER < 1400 || _MSC_VER > 1600
상단 부분을 찾아 1600 부분을 1700으로 아래와 같이 수정합니다.
#if _MSC_VER < 1400 || _MSC_VER > 1700
Syntax Highlighting
C++ syntax highlighting 기능을 사용하기 위해서는 아래와 같이 설정합니다.
1. 상단 메뉴에서 “도구 > 옵션” 을 선택하여 옵션창을 엽니다.
2. 해당 창에서 좌측 “텍스트 편집기 > 파일 확장명” 메뉴로 들어갑니다.
3. “확장명” 입력란에 “cu” 입력 후 편집기는 “Microsoft Visual C++” 를 선택하여 추가 해줍니다.
4. 확인 후 Visual Studio를 재실행 해줍니다.
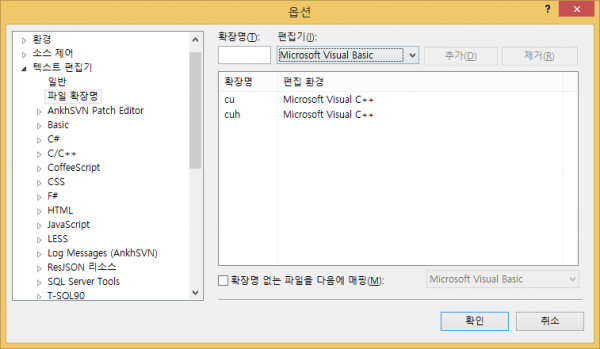
설치완료
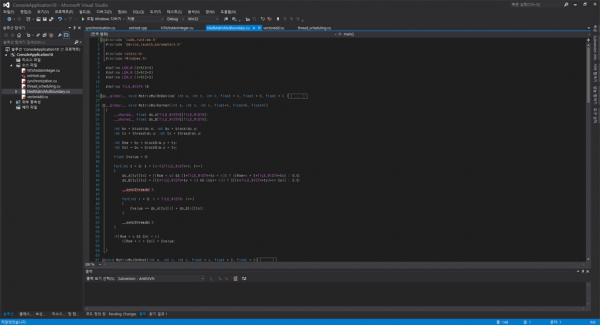
설치 완료 후에는 간단한 CUDA 예제를 Visual Studio 에서 돌려봅니다. 제 경우에는 __syncthreads() 함수가 밑줄 그어지는 것 외에는 잘 작동하는 것 같습니다.
*본 글을 위 링크들을 참조하여 작성하였습니다.
![[C++] Vcpkg 이용하여 boost 라이브러리 설치하기](https://tech.sangron.com/wp-content/uploads/sites/2/2018/10/cpp_wallpaper-768x480.jpg)
![[Crypto Currency] Ubuntu에서 CCMiner로 Mining 시작하기](https://tech.sangron.com/wp-content/uploads/sites/2/2019/02/blank_500x500-768x480.jpg)
![[Ubuntu] 14.04에서 gcc/g++ 4.9 설치하기](https://tech.sangron.com/wp-content/uploads/sites/2/2017/12/ubuntu_wallpaper_2-768x480.jpg)

![[Docker] 시작하기](https://tech.sangron.com/wp-content/uploads/sites/2/2025/08/Docker_wallpaper_1920x1080-150x150.jpg)