시작하기 전에
sudo apt-get update && sudo apt-get upgrade
Let’s Encrypt 설치
1. git 설치
sudo apt-get install git
2. Git에서 letsencrypt 저장소 복제
sudo git clone https://github.com/letsencrypt/letsencrypt /opt/letsencrypt
3. 폴더로 이동
cd /opt/letsencrypt
Let’s Encrypt SSL 인증서 생성
일반적인 방법
sudo -H ./letsencrypt-auto certonly --standalone -d example.com -d www.example.com
주의할 점은 let’s encrypt SSL의 경우 wildcard (*) 를 지원하지 않기 때문에 -d 옵션을 사용하여 모든 sub-domain을 등록해주어야 한다.
인터넷에 따르면 등록은 20개 까지 가능한데, 문자열에 길이에 따라 등록 가능 수는 달라질 수 있다고 한다.
아파치 서버 사용 시
sudo -H ./letsencrypt-auto certonly --apache -d example.com -d www.example.com
Nginx 사용 시
sudo -H ./letsencrypt-auto certonly --nginx -d example.com -d www.example.com
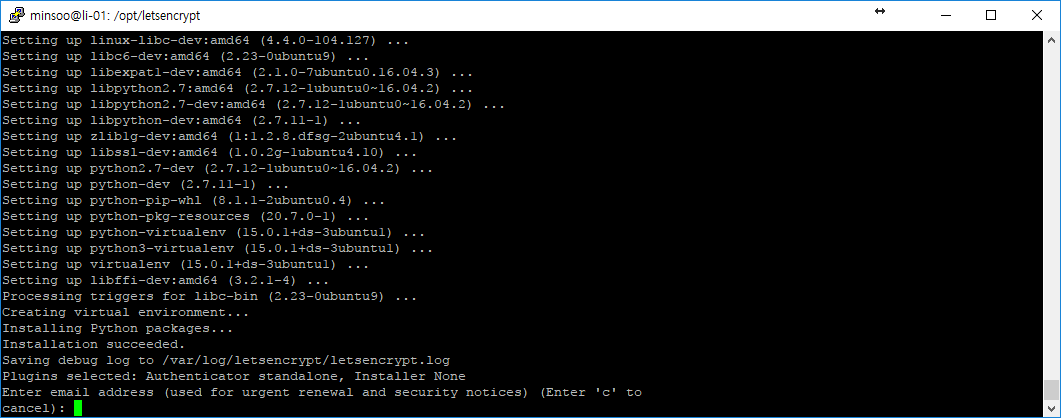
관리자 이메일 주소 입력
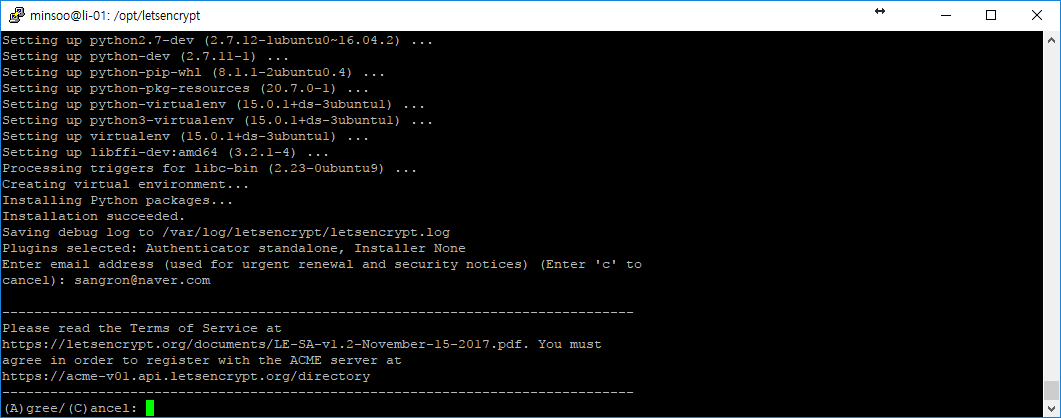
약관 동의
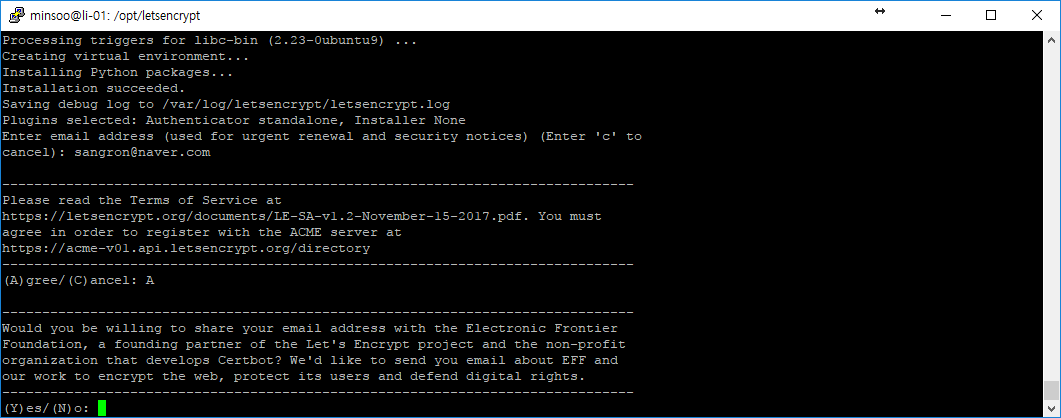
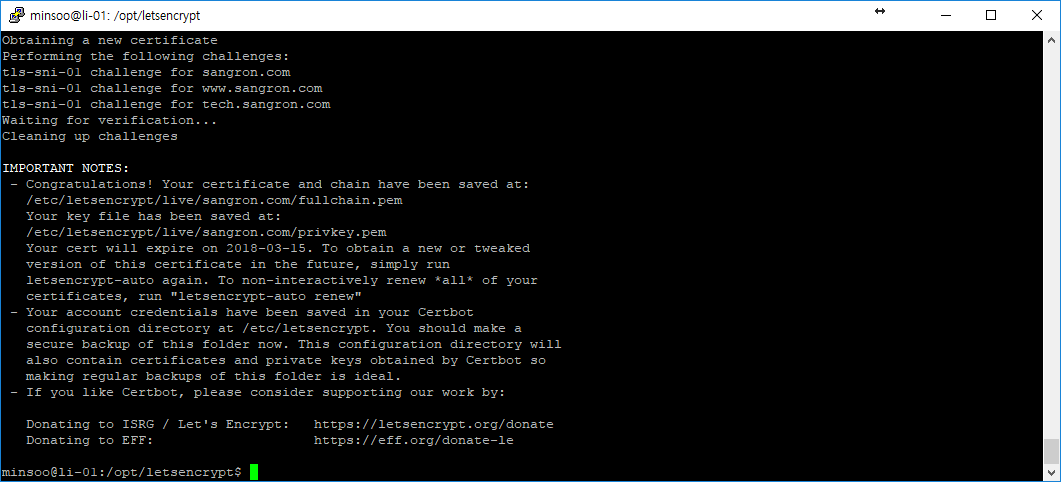
SSL 발급이 성공적으로 이루어졌습니다.
Let’s Encrypt SSL 인증서 확인
rony@sangron:~$ sudo ls /etc/letsencrypt/live
sangron.com
rony@sangron:~$ sudo ls /etc/letsencrypt/live/sangron.com
cert.pem  chain.pem  fullchain.pem  privkey.pem  README
아파치 서버와 SSL 연동
1. conf 파일 생성
root@sangron:/etc/apache2/sites-available# cp default-ssl.conf example.com.conf
2. conf 파일 편집
<IfModule mod_ssl.c>
    <VirtualHost *:443>
        SSLEngine On
        SSLCertificateFile /etc/letsencrypt/live/example.com/cert.pem
        SSLCertificateKeyFile /etc/letsencrypt/live/example.com/privkey.pem
        SSLCertificateChainFile /etc/letsencrypt/live/example.com/chain.pem

        ServerAdmin example@example.com
        ServerName example.com
        ServerAlias *.example.com

        ...
    </VirtualHost>
</IfModule>
3. conf 파일 연결
root@sangron:/etc/apache2/sites-available# cd ../site-enable
root@sangron:/etc/apache2/sites-enable# ln -s ../site-avaiable/example.com.conf example.com.conf
Apache2.conf 파일에서 실제 설정은 enable 폴더에 값을 가져옴.
4. Apache SSL 사용
rony@sangron:~/letsencrypt$ a2enmod ssl
Considering dependency setenvif for ssl: Module setenvif already enabled Considering dependency mime for ssl: Module mime already enabled Considering dependency socache_shmcb for ssl: Enabling module socache_shmcb. Enabling module ssl. See /usr/share/doc/apache2/README.Debian.gz on how to configure SSL and create self-signed certificates. To activate the new configuration, you need to run: service apache2 restart root@li-01:~/letsencrypt#
rony@sangron:~/letsencrypt$ a2ensite example.com
5. Apache 재시작
root@sangron:/etc/apache2# service apache2 restart
워드프레스 SSL 인증서 연동
SSL 인증서 지원 플러그인 설치
플러그인 활성화
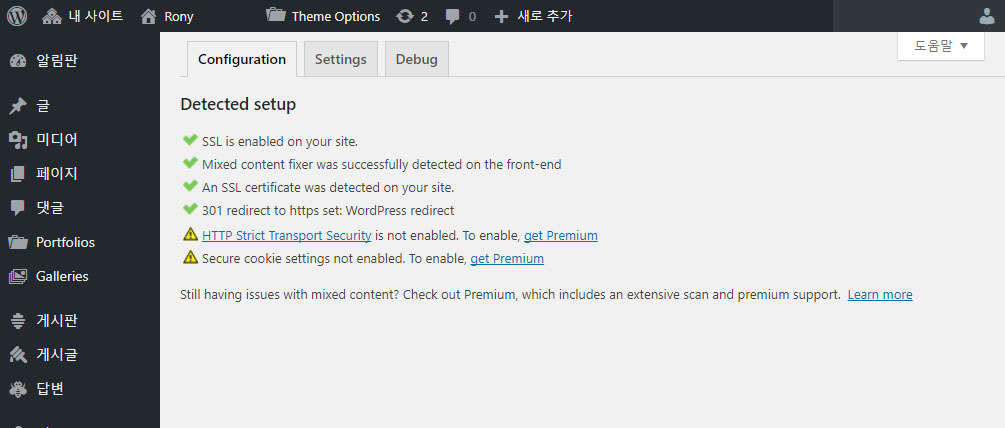
인증서 연동 확인
Openssl 사용
openssl s_client -CApath /etc/ssl/certs/ -connect example.com:443
웹사이트를 이용한 SSL Server Test
웹브라우저에서 확인
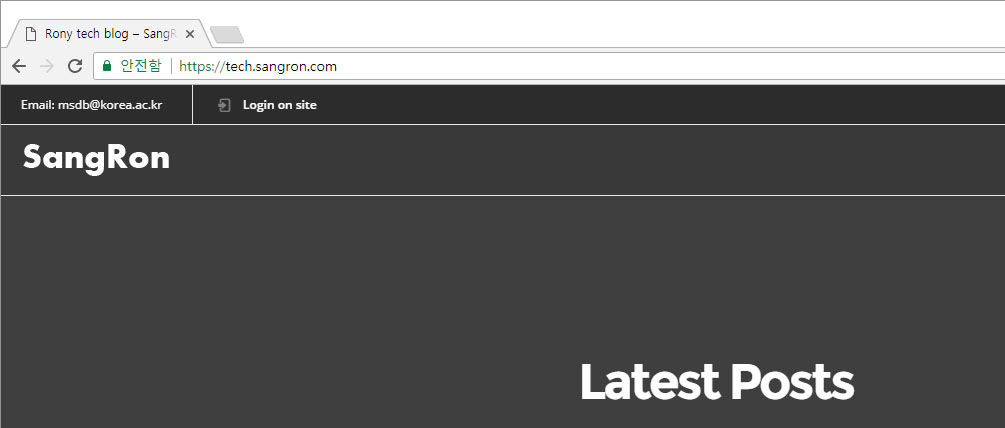
크롬 브라우저 사용 시 주소창 앞에 초록색 자물쇠 아이콘과 함께 안전함 글자 표기됨을 볼 수 있다.
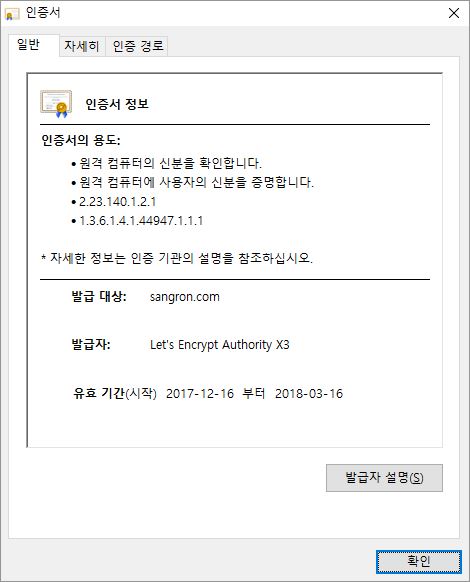
다음과 같이 인증서 내용을 볼 수 있습니다.
Letsencrypt에서 certbot 사용
root@sangron:/opt/letsencrypt# ./certbot-auto certificates
Saving debug log to /var/log/letsencrypt/letsencrypt.log

-------------------------------------------------------------------------------
Found the following certs:
  Certificate Name: sangron.com
    Domains: sangron.com tech.sangron.com www.sangron.com
    Expiry Date: 2018-00-00 00:00:00+00:00 (VALID: 89 days)
    Certificate Path: /etc/letsencrypt/live/sangron.com/fullchain.pem
    Private Key Path: /etc/letsencrypt/live/sangron.com/privkey.pem
-------------------------------------------------------------------------------
SSL 자동 갱신
Let’s Encrypt 인증서의 경우 무료로 제공되는 대신 90일 마다 인증서 갱신이 필요하다. 리눅스의 crontab을 이용하여 매달 주기적으로 인증서 갱신 작업을 예약하면, 관리자가 매번 수동으로 인증서를 갱신할 필요가 없다.
echo '@monthly root /opt/letsencrypt/letsencrypt-auto certonly --quiet --standalone --renew-by-default -d example.com -d www.example.com >> /var/log/letsencrypt/letsencrypt-auto-update.log' | sudo tee --append /etc/crontab
Apache 사용자의 경우
echo '@monthly root /opt/letsencrypt/letsencrypt-auto certonly --quiet --apache --renew-by-default -d example.com -d www.example.com >> /var/log/letsencrypt/letsencrypt-auto-update.log' | sudo tee --append /etc/crontab
전체 갱신
/opt/letsencrypt/letsencrypt-auto renew
아래는 crontab에서 쓰일 수 있는 키워드 목록이다.
| string | meaning |
| @reboot | Run once, at startup. |
| @yearly | Run once a year, “0 0 1 1 *”. |
| @annually | (same as @yearly) |
| @monthly | Run once a month, “0 0 1 * *”. |
| @weekly | Run once a week, “0 0 * * 0”. |
| @daily | Run once a day, “0 0 * * *”. |
| @midnight | (same as @daily) |
| @hourly | Run once an hour, “0 * * * *”. |
2023-07-31
앞서 작성한 아래의 방식대로 SSL 인증서 갱신 작업 시 다음과 같은 오류가 발생하여 갱신이 진행되지 않음.
Requesting to rerun /opt/letsencrypt/letsencrypt-auto with root privileges…
Your system is not supported by certbot-auto anymore.
certbot-auto and its Certbot installation will no longer receive updates.
You will not receive any bug fixes including those fixing server compatibility
or security problems.
Please visit https://certbot.eff.org/ to check for other alternatives.
대신에 /usr/bin 의 certbot을 사용하여 갱신을 진행할 수 있다.
sudo certbot renew
주기적으로 인증서를 갱신하기 위하여 Crontab을 이용하여 갱신 작업을 예약한다.
자세한 사용 방법은 상단에 crontab 키워드를 참고할 수 있다.
먼저 Crontab 에 새로운 작업을 추가하기 위해서 crontab 작업 문서를 연다.
sudo crontab -e
매월 1일 2시에 인증서 갱신 예약
0 1 2 * * /usr/bin/certbot renew --renew-hook="sudo systemctl restart apache2"
Crontab 작업 목록 보기
sudo crontab -l
갱신 도중 다음과 같은 애러가 발생할 수 있다.
Attempting to renew cert (sangron.com) from /etc/letsencrypt/renewal/sangron.com.conf produced an unexpected error: Problem binding to port 443: Could not bind to IPv4 or IPv6.. Skipping.
이는 인증서 초기 발급 시 standalone으로 발급받아서 발생하는 애러이다. 실제 인증서의 내용을 살펴보면 아래와 같다.
-------------------------------------------------------------------------------
Processing /etc/letsencrypt/renewal/sangron.com.conf
-------------------------------------------------------------------------------
Cert is due for renewal, auto-renewing...
Plugins selected: Authenticator standalone, Installer None
Renewing an existing certificate
Performing the following challenges:
tls-sni-01 challenge for sangron.com
tls-sni-01 challenge for tech.sangron.com
Cleaning up challenges
대신에 인증서를 해당하는 서버 버전으로 적용하여 재발급 하면 갱신이 가능하다.
apache 서버를 사용한다고 가정한다면 인증서의 내용이 아래와 같이 출력되어야 한다.
-------------------------------------------------------------------------------
Processing /etc/letsencrypt/renewal/sangron.com.conf
-------------------------------------------------------------------------------
Cert is due for renewal, auto-renewing...
Plugins selected: Authenticator apache, Installer apache
Renewing an existing certificate
Performing the following challenges:
tls-sni-01 challenge for sangron.com
tls-sni-01 challenge for tech.sangron.com
tls-sni-01 challenge for www.sangron.com
Waiting for verification...
Cleaning up challenges
인증서 자동 갱신이 수행되지 않을 경우 Let’sencrypt renewal 폴더의 configure 파일내에 인증서 관련 정보가 정확히 작성되어 있는지 확인한다.
root@sangron:~# cd /etc/letsencrypt/renewal
root@sangron:/etc/letsencrypt/renewal# cat sangron.com.conf
version = ~~
archive_dir = ~~
cert = ~~
privkey = ~~
chain = ~~
fullchain = ~~

# Options used in the renewal process
[renewalparams]
authenticator = apache
installer = apache
account = ~~
server = https://~~

![[WordPress] 다중 사이트 기능 이용](https://tech.sangron.com/wp-content/uploads/sites/2/2019/02/blank_500x500-768x480.jpg)
![[Spark on HDP 03] Scala와 Apache Spark를 활용하여 HDP내의 데이터 다루기](https://tech.sangron.com/wp-content/uploads/sites/2/2025/01/Spark_wallpaper_1920x1080-768x480.jpg)

![[Docker] 시작하기](https://tech.sangron.com/wp-content/uploads/sites/2/2025/08/Docker_wallpaper_1920x1080-150x150.jpg)
![[Spark] Spark 설치 (ubuntu)](https://tech.sangron.com/wp-content/uploads/sites/2/2025/01/Spark_wallpaper_1920x1080-150x150.jpg)